
Replacement LED module guide
How to Replace an LED Module in Illuminated Furniture
A practical method for illuminated tables, chairs, bars, planters, ice buckets and other translucent PE products.
To replace an LED module safely, first confirm that the module—not only the charger, remote or battery—is the likely problem. Then record the original unit, measure the mounting area and match the charging, electrical and sealing requirements. A similar diameter or appearance by itself does not prove compatibility.
Switch the product off and disconnect it from charging power. Do not open, puncture or rebuild a sealed lithium battery pack. If wiring is burned, wet or damaged, stop and ask a qualified technician to inspect the product.
Step 1
Check whether the LED module is actually the fault.
A product that does not light up can have several causes. Look for a damaged charger cable, dirty or corroded charging contacts, a missing remote battery, or a power button that has not been held long enough. If the original charger has an indicator, note whether its behaviour changes when connected.
If the unit works only while connected to power, the energy storage system may have reached the end of its service life. If it charges but does not respond to its known working remote, the control circuit or remote pairing may be involved. These observations help a supplier recommend a complete replacement module and matching accessories instead of an unnecessary part.
Step 2
Photograph every detail before removing the original unit.
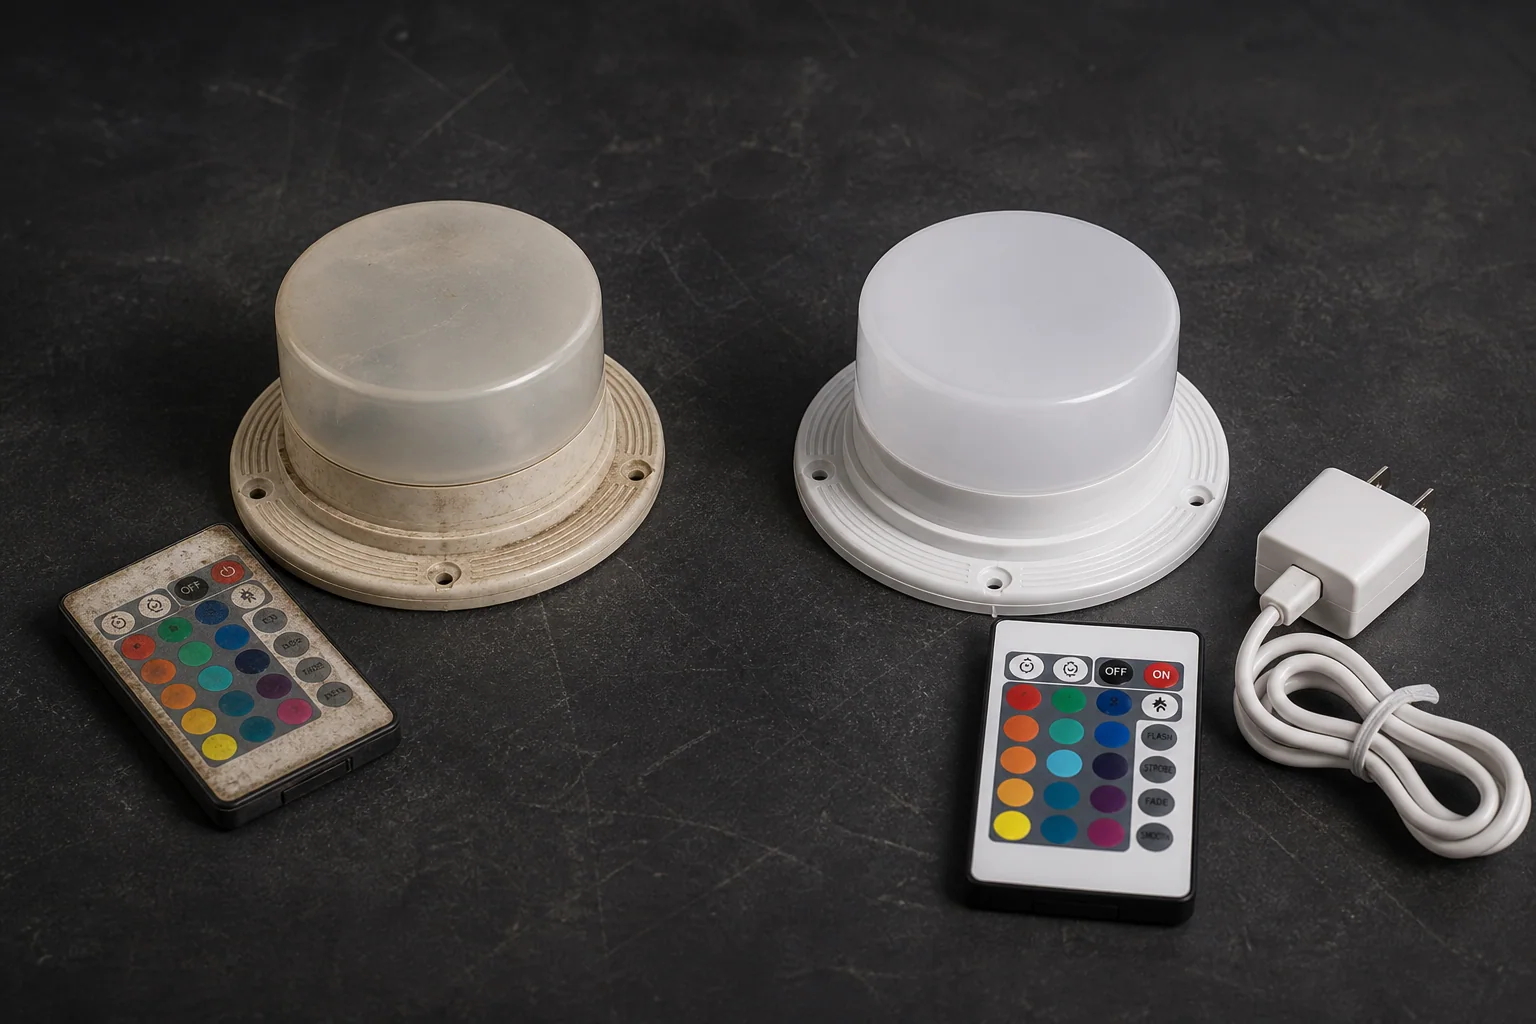
Take one wide photo showing where the module sits in the furniture, then close photographs of the front, underside, mounting screws, charging connector or base, charger label and remote control. Photograph any model number or rating label even if it is faded. Do not rely on a typed description when a clear photo can preserve the connector shape and mounting pattern.
Remove the mounting screws while supporting the module. Keep the gasket and screws for comparison, but replace a gasket that is cracked, compressed or permanently deformed. Do not pull a unit by its wires.
Step 3
Measure the module and the furniture opening.
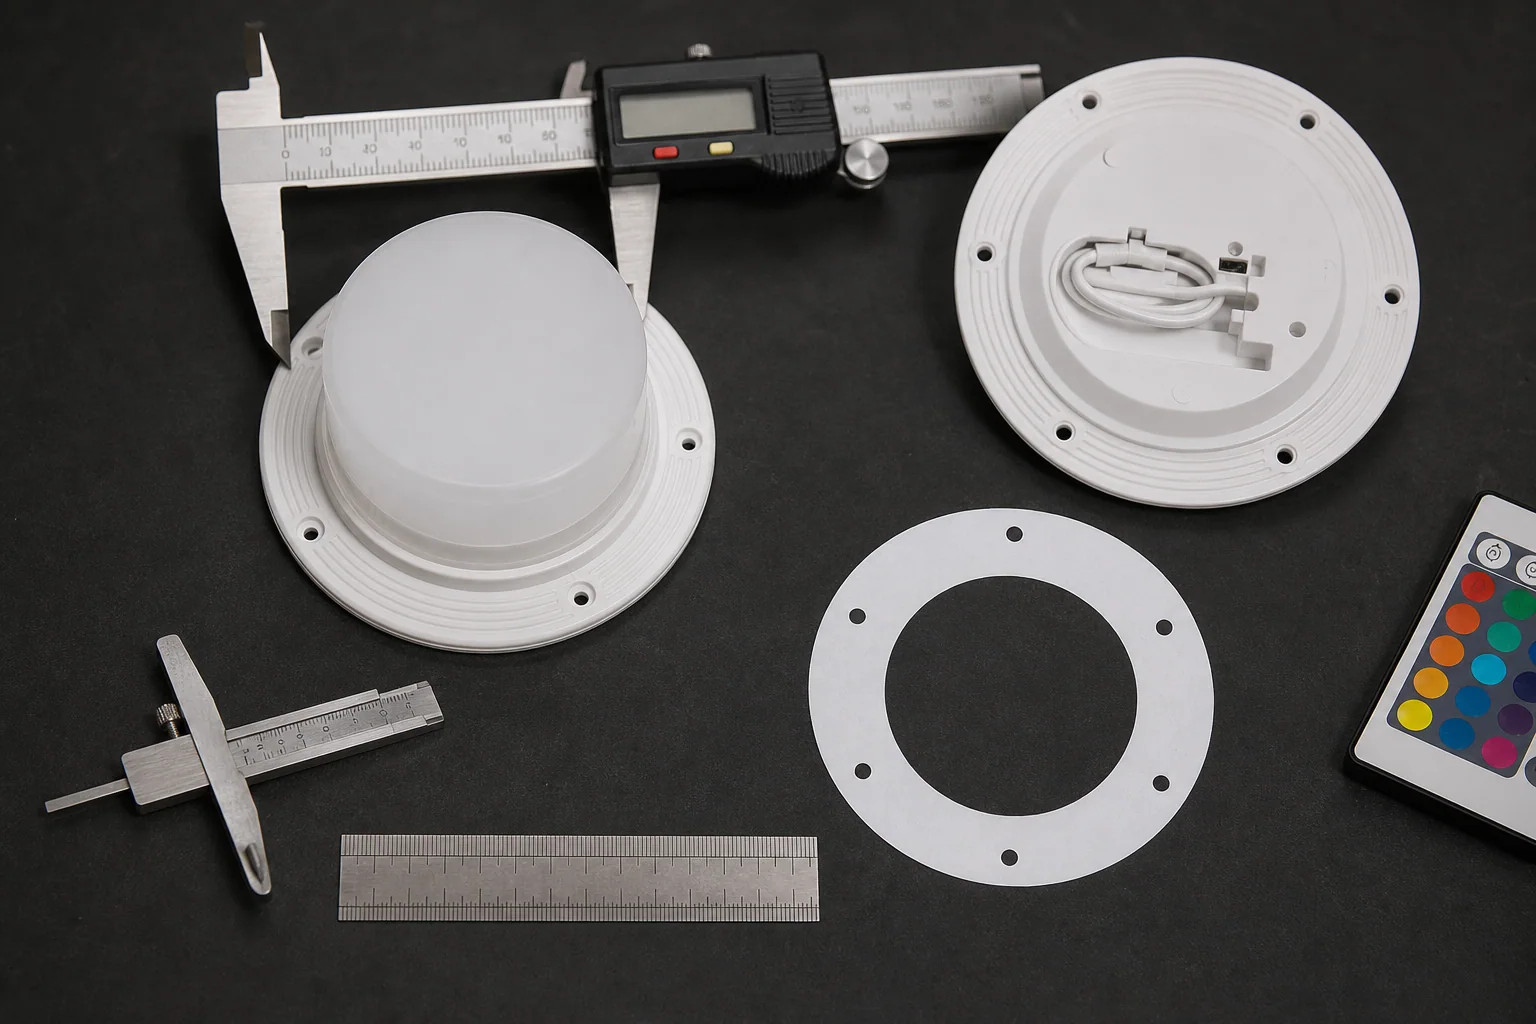
Use a caliper when possible and record dimensions in millimetres. Include a ruler in the photographs so the scale is visible. The most useful measurements are:
Measure the complete mounting flange, not only the raised diffuser.
Measure the service opening in the furniture where the module passes through.
Measure from the centre of one screw hole to the centre of the opposite or adjacent hole.
Check the clear internal space below the mounting surface, including connectors and cables.
Also count the mounting holes and note whether the flange sits above, below or flush with the furniture surface. A nominal “85 mm module,” for example, does not tell you the full flange diameter, hole pattern or depth. Compare the complete drawing or a physical sample before approving a replacement.
Illustrated replacement example
How a 120 mm VC-LN120 module fits a light ball.
This illustrated example shows a 120 mm direct-charge VC-LN120 LED module installed in a translucent PE light ball. Buyers may describe the internal lighting assembly as a replacement LED module, replacement LED light, LED unit, LED kit, light engine or replacement LED components. Whatever name is used, compatibility must be confirmed from measurements and system details—not appearance alone.
Useful reference platforms include the 85 mm direct-charge VC-L85 and induction-charge VC-LI85, plus the 120 mm direct-charge VC-LN120 and induction-charge VC-LI120. These links help compare the systems; they do not confirm interchangeability.
This example applies only when the mounting seat, centre opening, six-hole pattern, installation depth, charging system and controls are compatible. Do not force the module into an opening or drill new holes before confirming the complete installation.
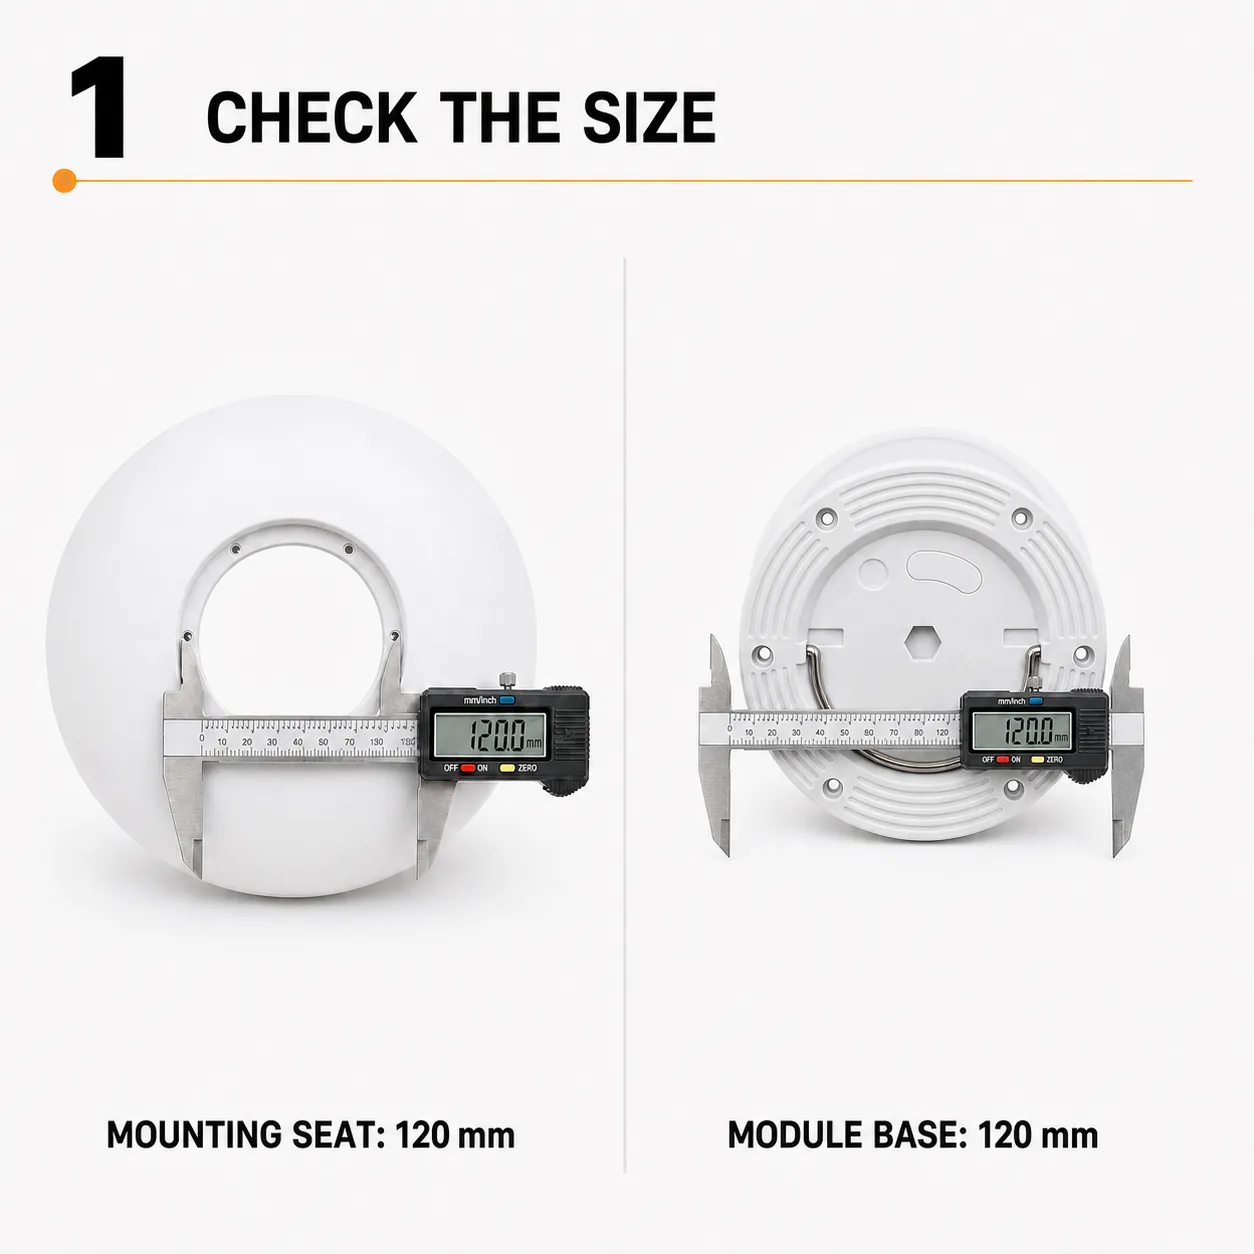
1. Check the mounting seat and module diameter.
Measure the outside diameter of the furniture's recessed mounting seat, then measure the complete outside diameter of the replacement module base. In this example, both are 120 mm. Also confirm the centre opening, available internal depth, screw-hole pattern, gasket position, charger and remote-control system.
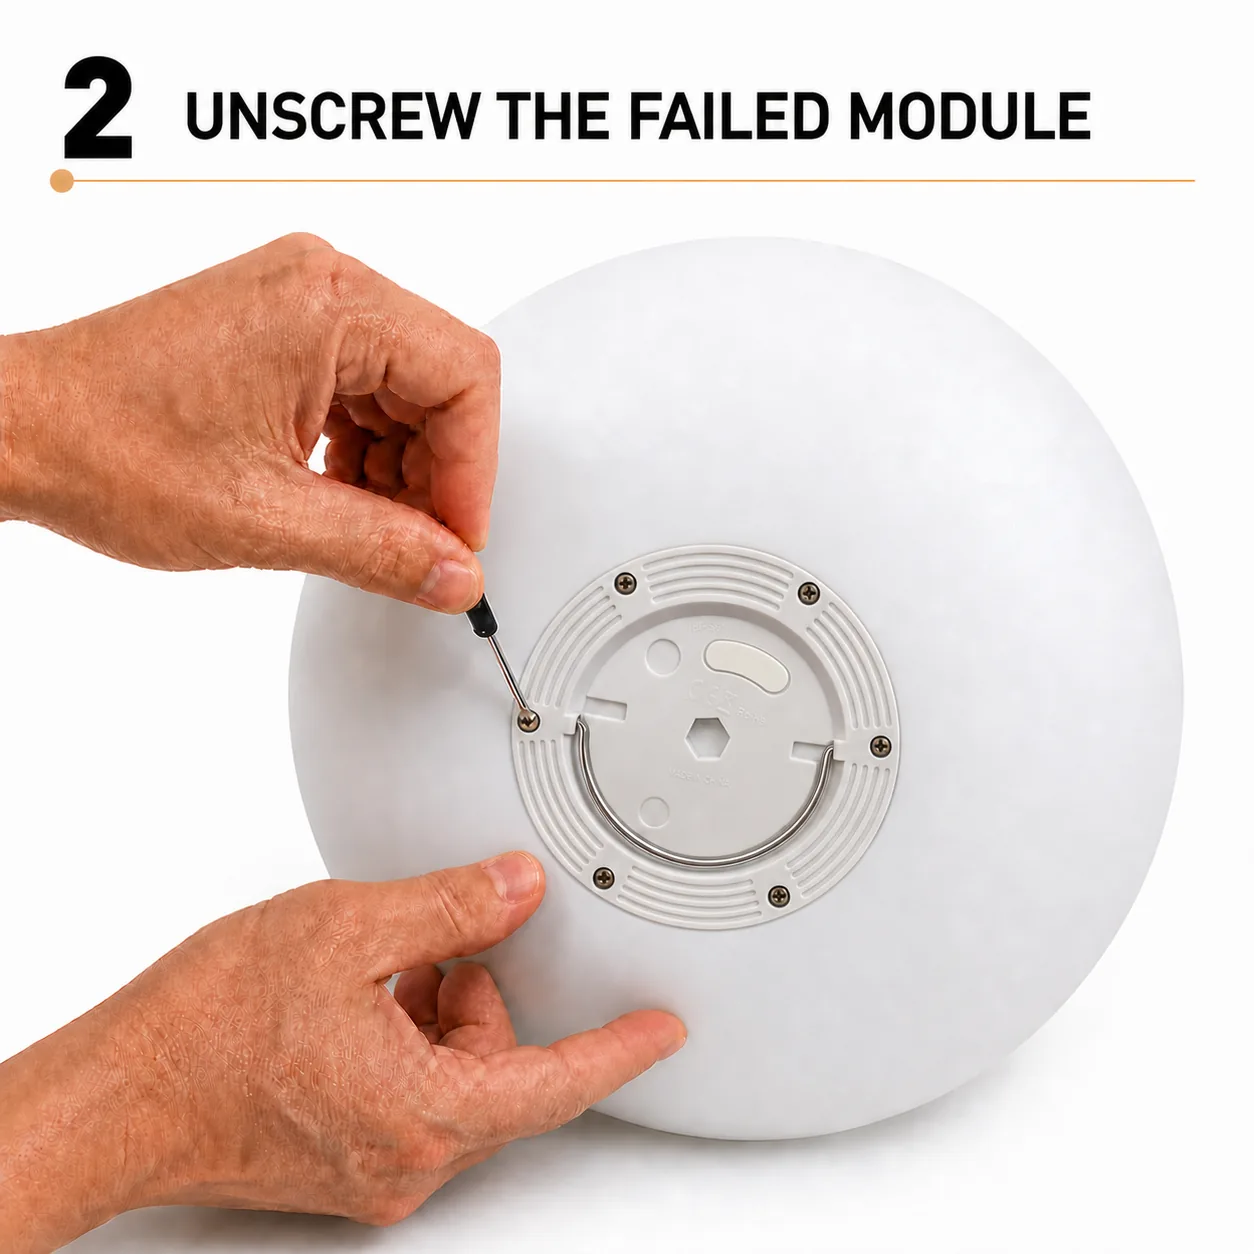
2. Unscrew the failed LED module.
Switch the product off and disconnect the charger. Support the old LED light unit while loosening the six mounting screws so the module does not drop or pull against internal parts.
3. Remove the old lighting unit.
Lift the failed module straight out and inspect the recessed seat, centre opening and screw holes. Clean the mounting surface carefully. Replace the sealing ring if it is cracked, permanently compressed or damaged.
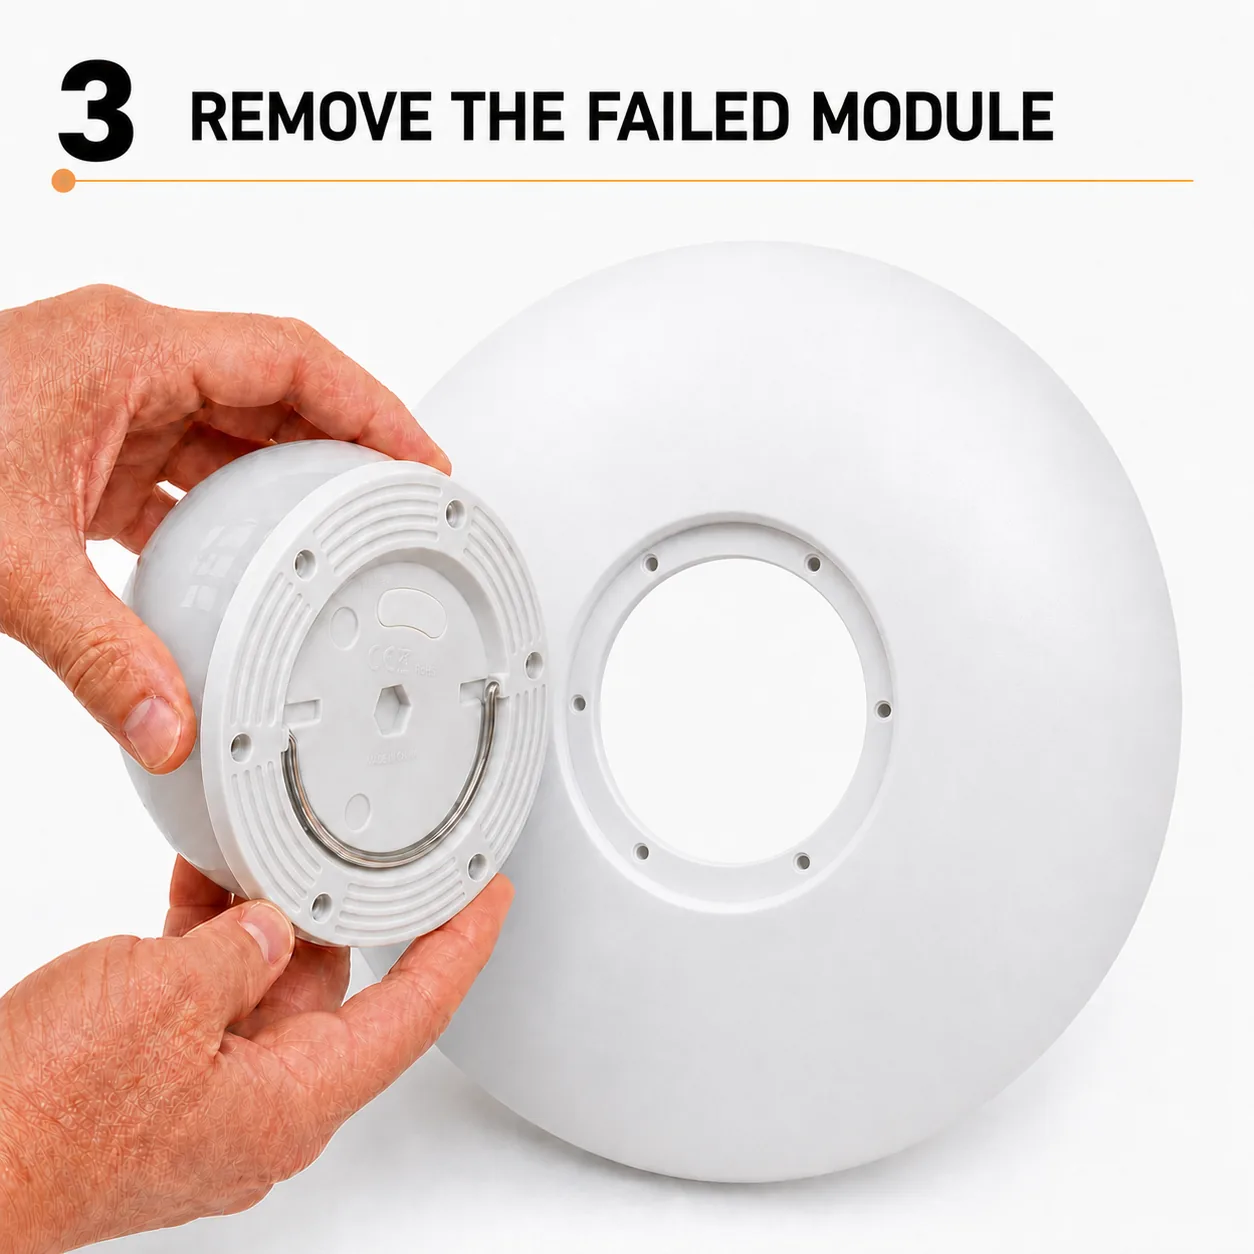
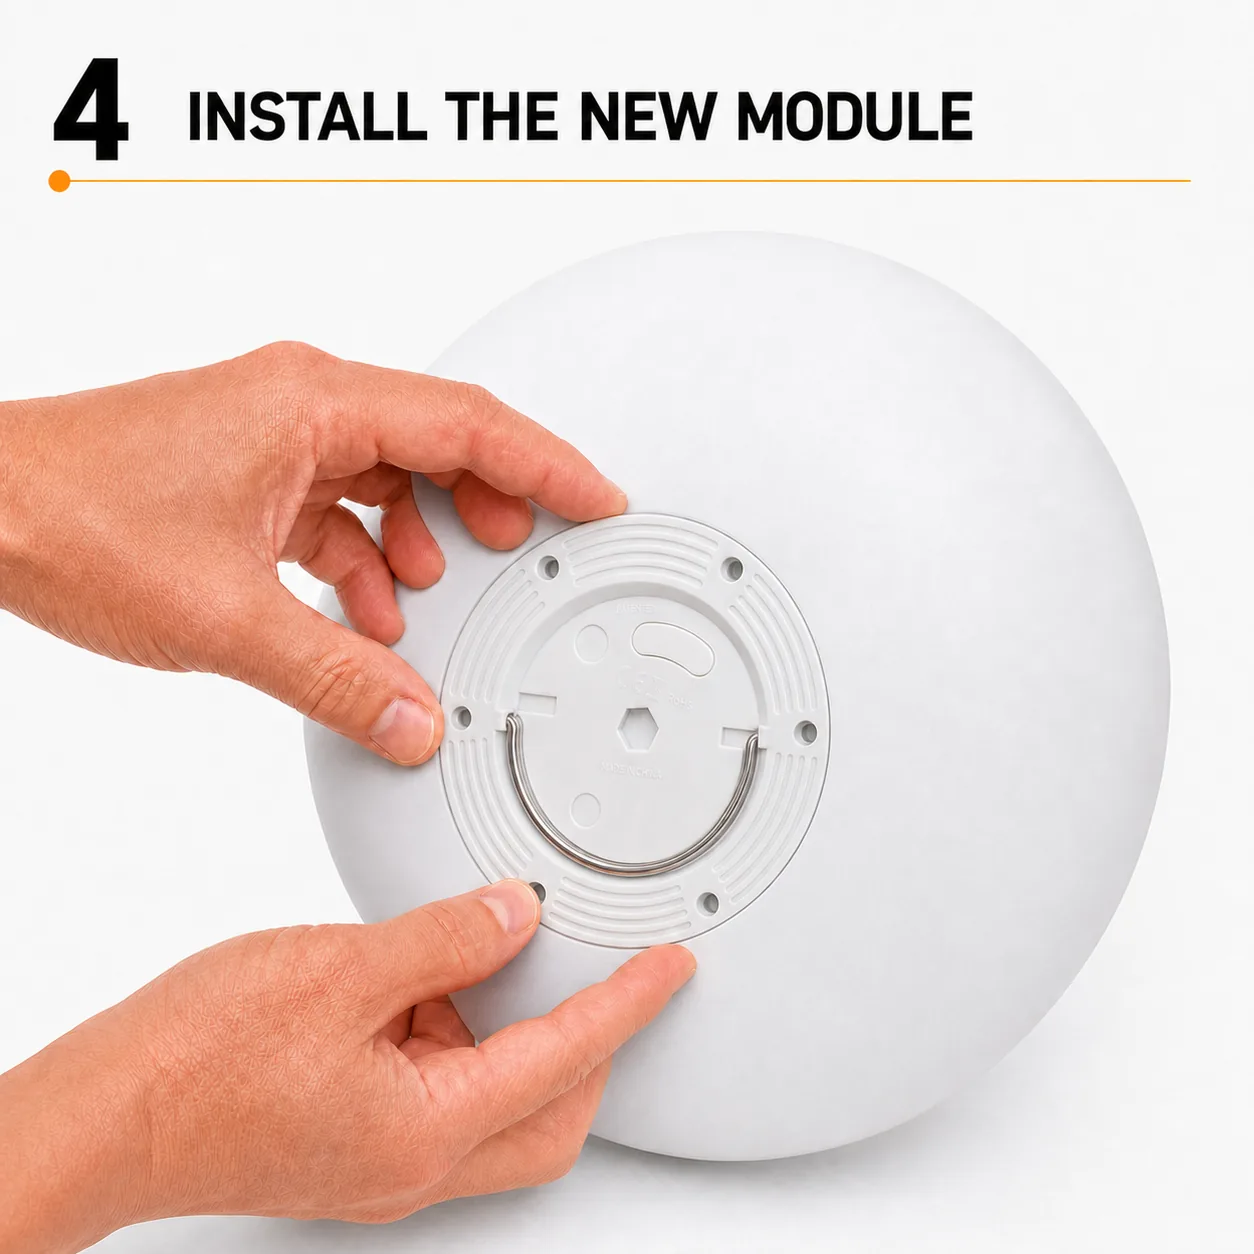
4. Fit the new VC-LN120 module.
Position the waterproof sealing ring correctly around the new module. Insert the light dome through the centre opening so it sits inside the furniture while the circular module base remains outside. Align all six mounting holes and make sure the base sits flat inside the recess.
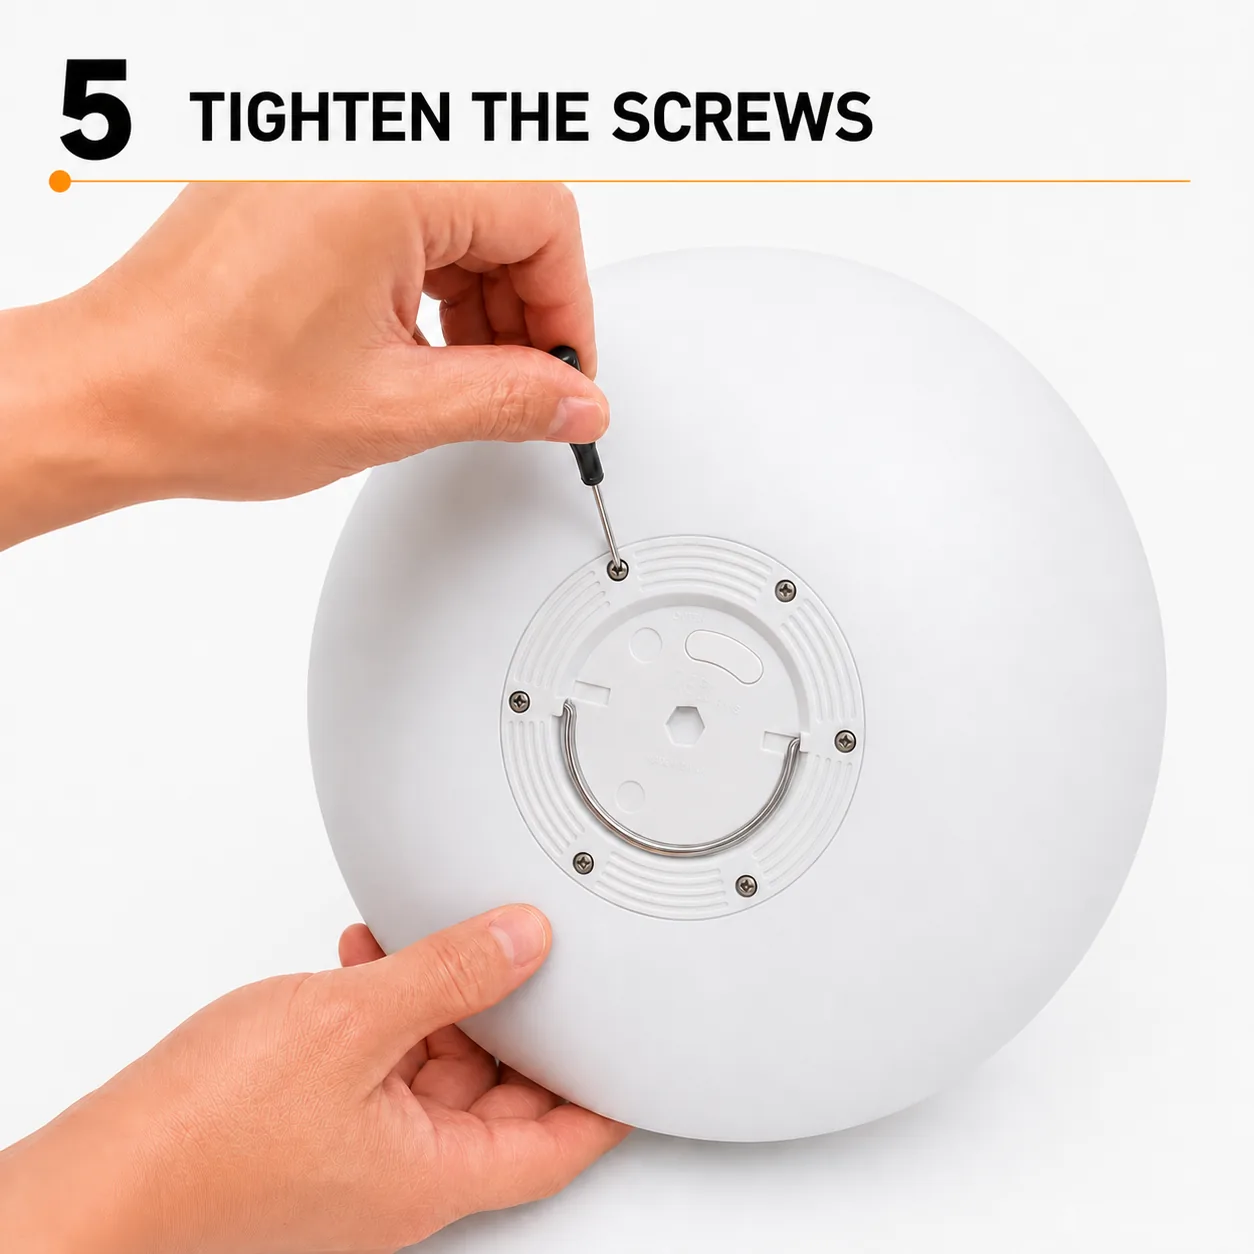
5. Tighten the six screws evenly.
Install all six screws and tighten them gradually in an alternating pattern. The goal is even pressure around the sealing ring. Do not overtighten the screws or distort the plastic module base or furniture shell.
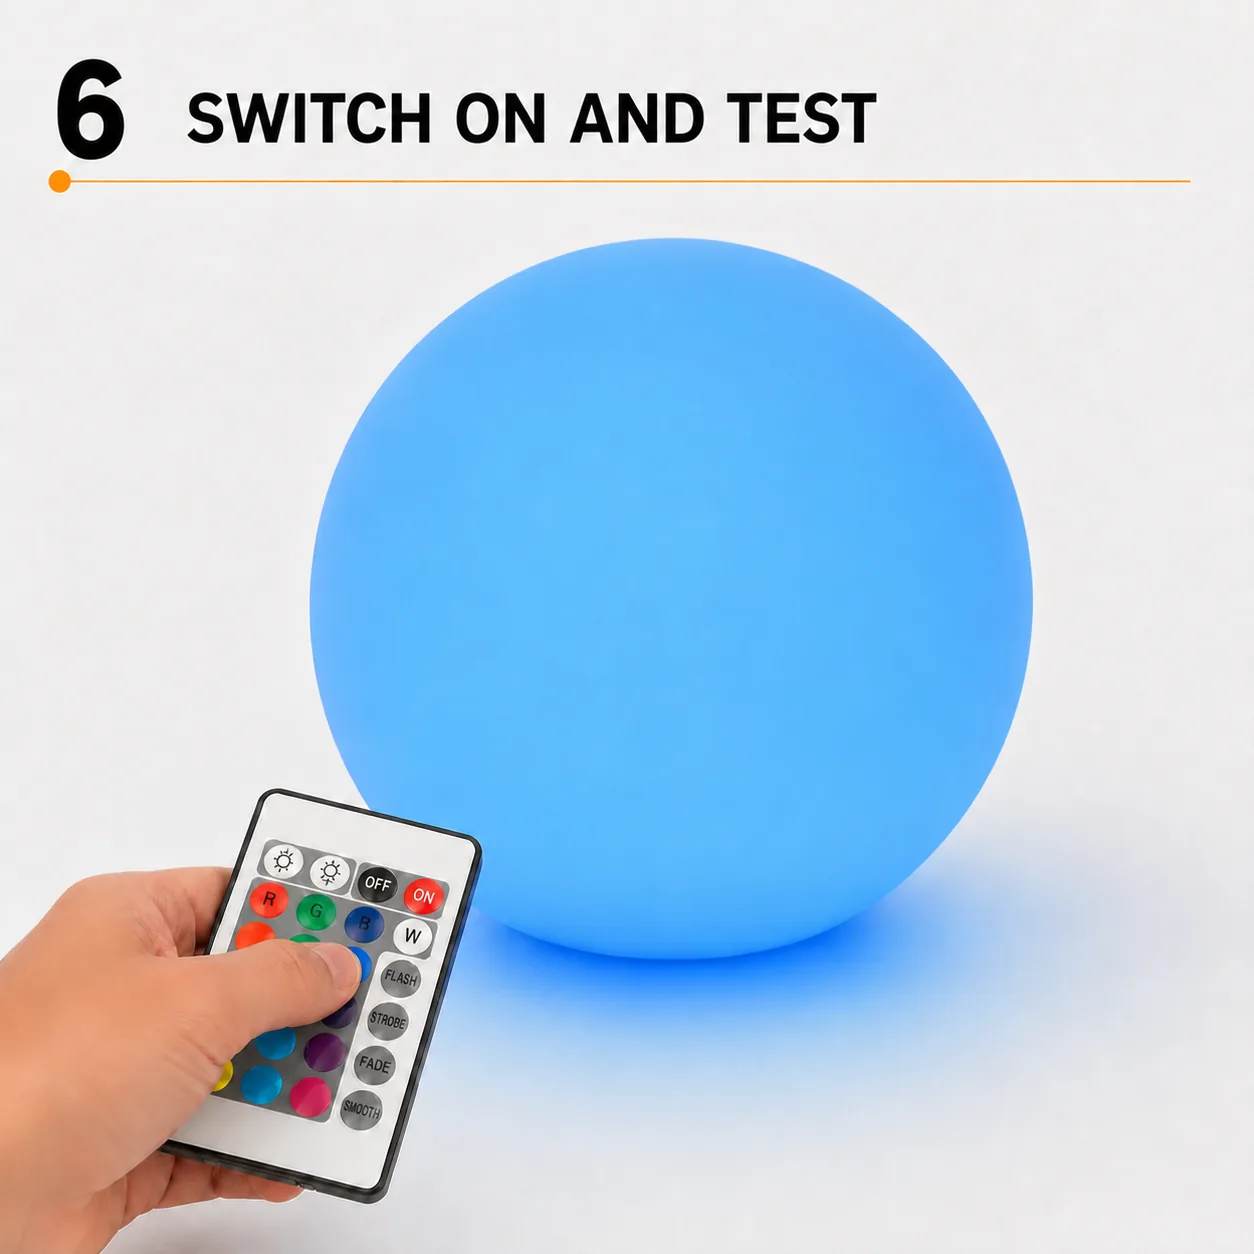
6. Switch on and test the replacement light.
Turn the furniture upright, switch the new module on and test the remote control, colour selection, charging and light diffusion. A successful replacement should illuminate the product evenly without movement or gaps around the module base.
For other module sizes and charging systems, compare the full LED module range or send the original product details through Vcan's replacement LED module compatibility service.
Step 4
Match direct charging, induction charging and controls.
A direct-charge module connects to a cable or charging socket. An induction-charge module receives power without an exposed electrical connector and must be paired with the correct charging base. The two systems are not interchangeable simply because the modules fit the same opening.
Confirm the charger output, connector type, polarity, charging base and remote-control system. Never test an unknown charger by appearance alone. The safest replacement is often a complete, matched set of module, charger and remote.
Finally, tell the supplier where the product is used. A dry indoor table and an outdoor planter exposed to rain do not have the same sealing requirements. An IP rating describes the tested module; it does not guarantee the waterproof performance of the completed furniture after installation.
Explore Vcan’s rechargeable LED module range or compare the dedicated replacement compatibility service.
For a detailed platform comparison, read our guide to direct-charge and induction-charge LED modules.
Step 5
Install the matched module, then test before final sealing.
- Clean and dry the furniture opening and remove old sealant without damaging the surface.
- Check that the new gasket lies flat and that the module enters without forcing the shell.
- Align the screw holes. Tighten gradually in a cross pattern so pressure is even; do not overtighten plastic parts.
- Test charging, power, colour selection and remote response before completing the final sealing work.
- After installation, follow the supplier’s charging and water-exposure instructions.
If the mounting holes or depth do not match, stop rather than drilling or cutting immediately. A different standard platform, an adapter or an OEM solution may be safer and more serviceable.
Compatibility checklist
Send these details for a useful recommendation.
- Photos of the module front, underside and installation opening
- Outer diameter, opening diameter, hole spacing and available depth
- Charger label, connector or charging-base photos
- Remote-control front and back photos
- Indoor or outdoor use and expected water exposure
- Required quantity and destination country
Common questions
Before ordering a replacement.
Can I choose a replacement from the outside diameter alone?
No. Two modules with a similar diameter may have different screw positions, installation depths, charging systems, voltage, remote-control protocols or sealing structures.
Can I reuse the old charger and remote control?
Only after compatibility is confirmed. Charger output, connector polarity, remote frequency and control protocol can differ even when the accessories look similar.
Does an IP-rated module automatically make the furniture waterproof?
No. The finished assembly also depends on the opening, gasket condition, screw pressure, cable route, orientation and installation quality.
Can Vcan help with one replacement or a small test order?
Send the required quantity with the compatibility information. Availability and order conditions depend on the model, but small replacement and sample enquiries are welcome.
This guide provides general selection and replacement information. The original manufacturer’s instructions and local electrical safety requirements take priority for a specific product.